Before starting these playbooks, make sure you have configured the server. For instructions on how to configure the server, please refer to my blog.
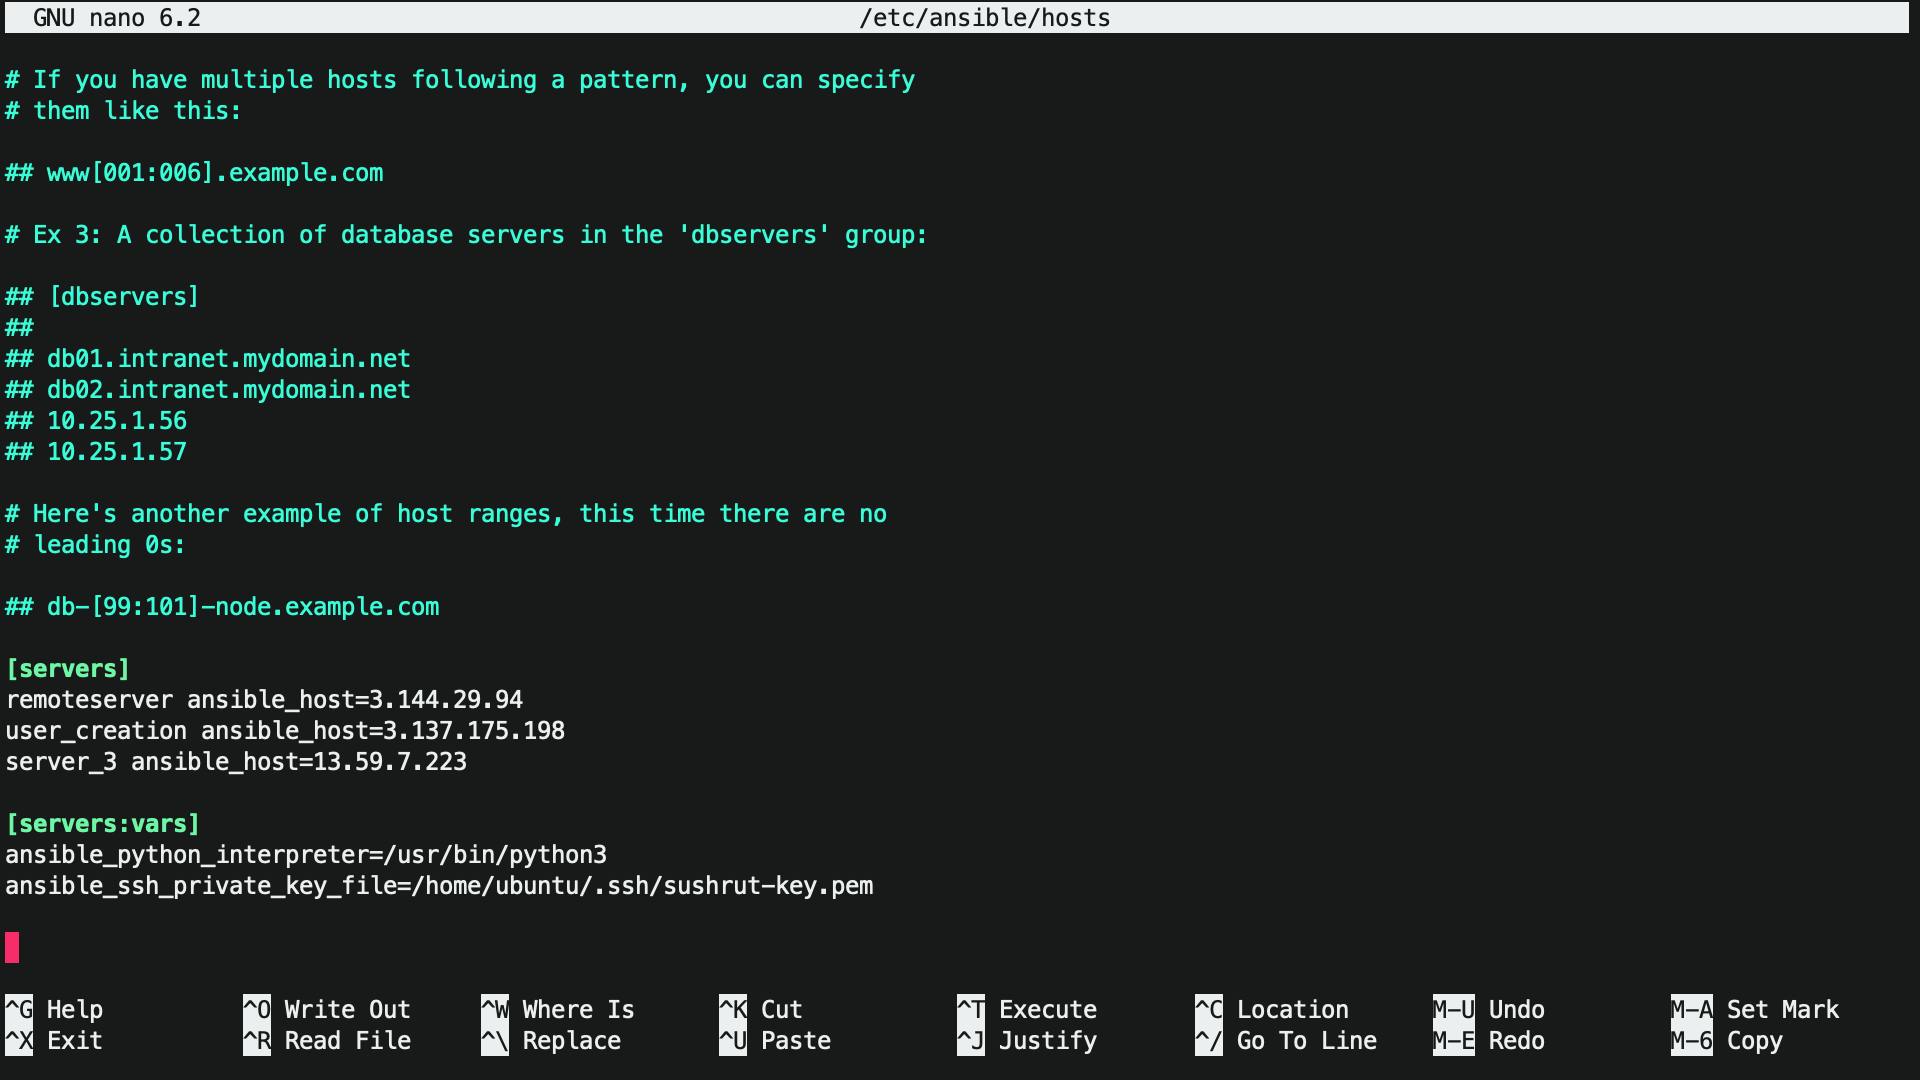
sudo nano /etc/ansible/hosts
The command sudo nano /etc/ansible/hosts opens the Ansible inventory file located at /etc/ansible/hosts for editing using the nano text editor with superuser privileges. This file is used to define the hosts or servers that Ansible will manage and their properties such as IP addresses, hostnames, variables, and groups.

This is an Ansible inventory file containing three servers listed under the [servers] group.
The first server's hostname or IP address is 3.144.29.94 and is named remoteserver. The second server's hostname or IP address is 3.137.175.198 and is named user_creation. The third server's hostname or IP address is 13.59.7.223 and is named server_3.
The [servers:vars] section contains variables that apply to all servers listed under the [servers] group. In this case, it sets the path to the Python interpreter and the SSH private key file for the user ubuntu.
Ansible uses this inventory file to connect to the servers and execute tasks defined in playbooks.
---
- name: Create file on remote server
  hosts: remoteserver
  become: true

  tasks:
    - name: Create file
      file:
        path: /tmp/example.txt
        state: touch
        mode: "0644"

    - name: Add content to file
      lineinfile:
        path: /tmp/example.txt
        line: "This is an example file created by Ansible."

- name: Check if file exists on remote server
  hosts: remoteserver
  become: true

  tasks:
    - name: Check file existence
      stat:
        path: /tmp/example.txt
      register: file_stat

    - name: Display result
      debug:
        msg: "File exists: {{ file_stat.stat.exists }}"
This playbook first creates a file named example.txt on the remote server specified in the remoteserver host group. The file module is used to create the file with the specified permissions.
Next, the lineinfile module is used to add a line of text to the file, indicating that it was created by Ansible.
Finally, the playbook checks whether the file exists on the remote server using the stat module. The result is stored in the file_stat variable, which is then used in the debug module to display a message indicating whether the file exists or not.
Note that this playbook only creates and checks the existence of a file on a single remote server specified in the remoteserver group. If you want to create the file on multiple servers, you can add those servers to the remoteserver group, or create a new group for those servers.
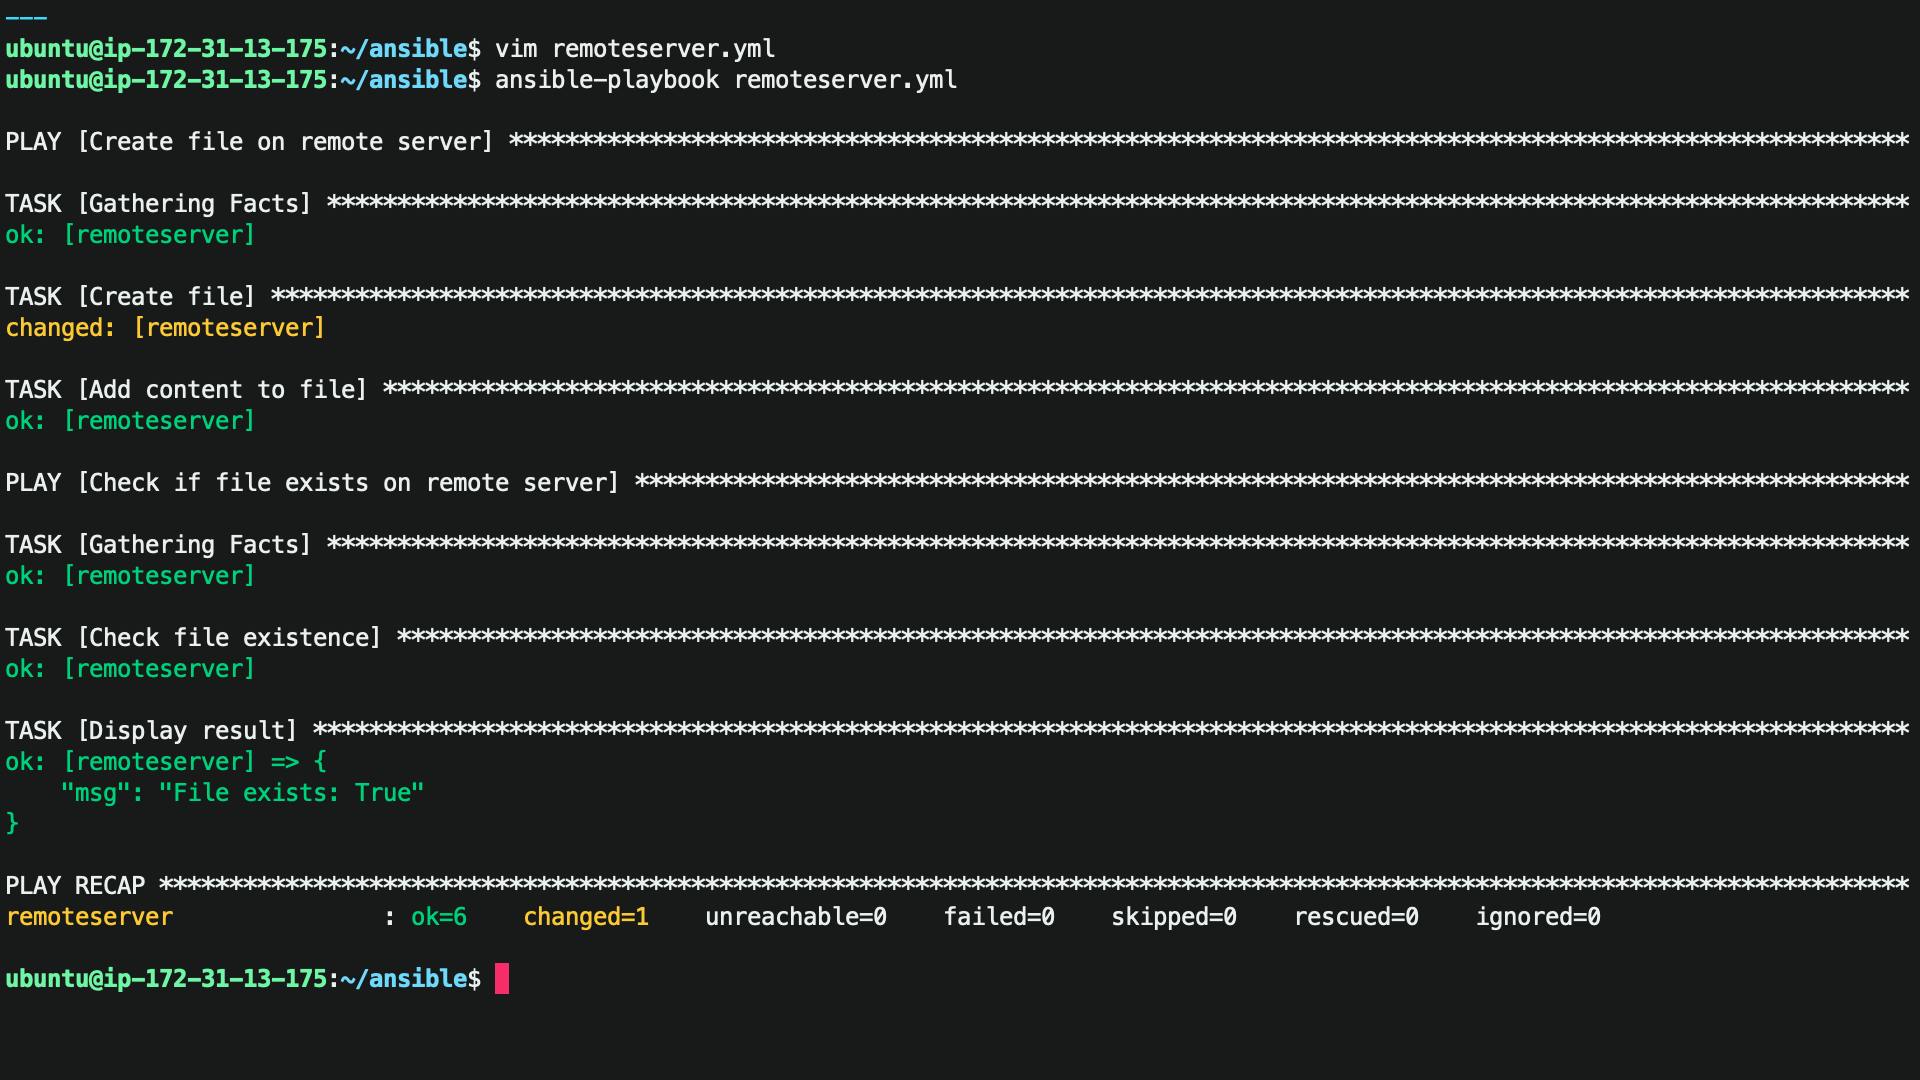
ansible-playbook remoteserver.yml

File Crested Successfully.
---
- name: Create a new user and show user list
  hosts: user_creation
  become: true

  vars:
    new_user: sushrut
    new_user_password: pass123

  tasks:
    - name: Create user
      user:
        name: "{{ new_user }}"
        password: "{{ new_user_password | password_hash('sha512') }}"
        state: present

    - name: List all users
      shell: "cat /etc/passwd | cut -d':' -f1"
      register: user_list

    - name: Display user list
      debug:
        var: user_list.stdout_lines
This is an example of an Ansible playbook that creates a new user on a remote host and displays a list of all users on the host. Here is a brief explanation of the different sections:
The
namekeyword specifies a name for the playbook.The
hostskeyword specifies the target host or hosts to execute the playbook. In this case, it is a single host with IP address10.0.0.2.The
becomekeyword indicates that the playbook should execute with elevated privileges (i.e., become root).The
varssection defines variables used in the tasks.The
taskssection contains a list of tasks to execute in sequence.The first task creates a new user named
johnwith the passwordpass123using the Ansibleusermodule. Thepassword_hashfilter hashes the password with the SHA-512 algorithm before storing it.The second task uses the
shellmodule to run thecatcommand to display the contents of the/etc/passwdfile and then uses thecutcommand to extract the first field, which is the username. The output is stored in theuser_listvariable using theregisterkeyword.The third task uses the
debugmodule to display thestdout_linesattribute of theuser_listvariable, which contains the output of the previous task. This will display a list of all users on the host.
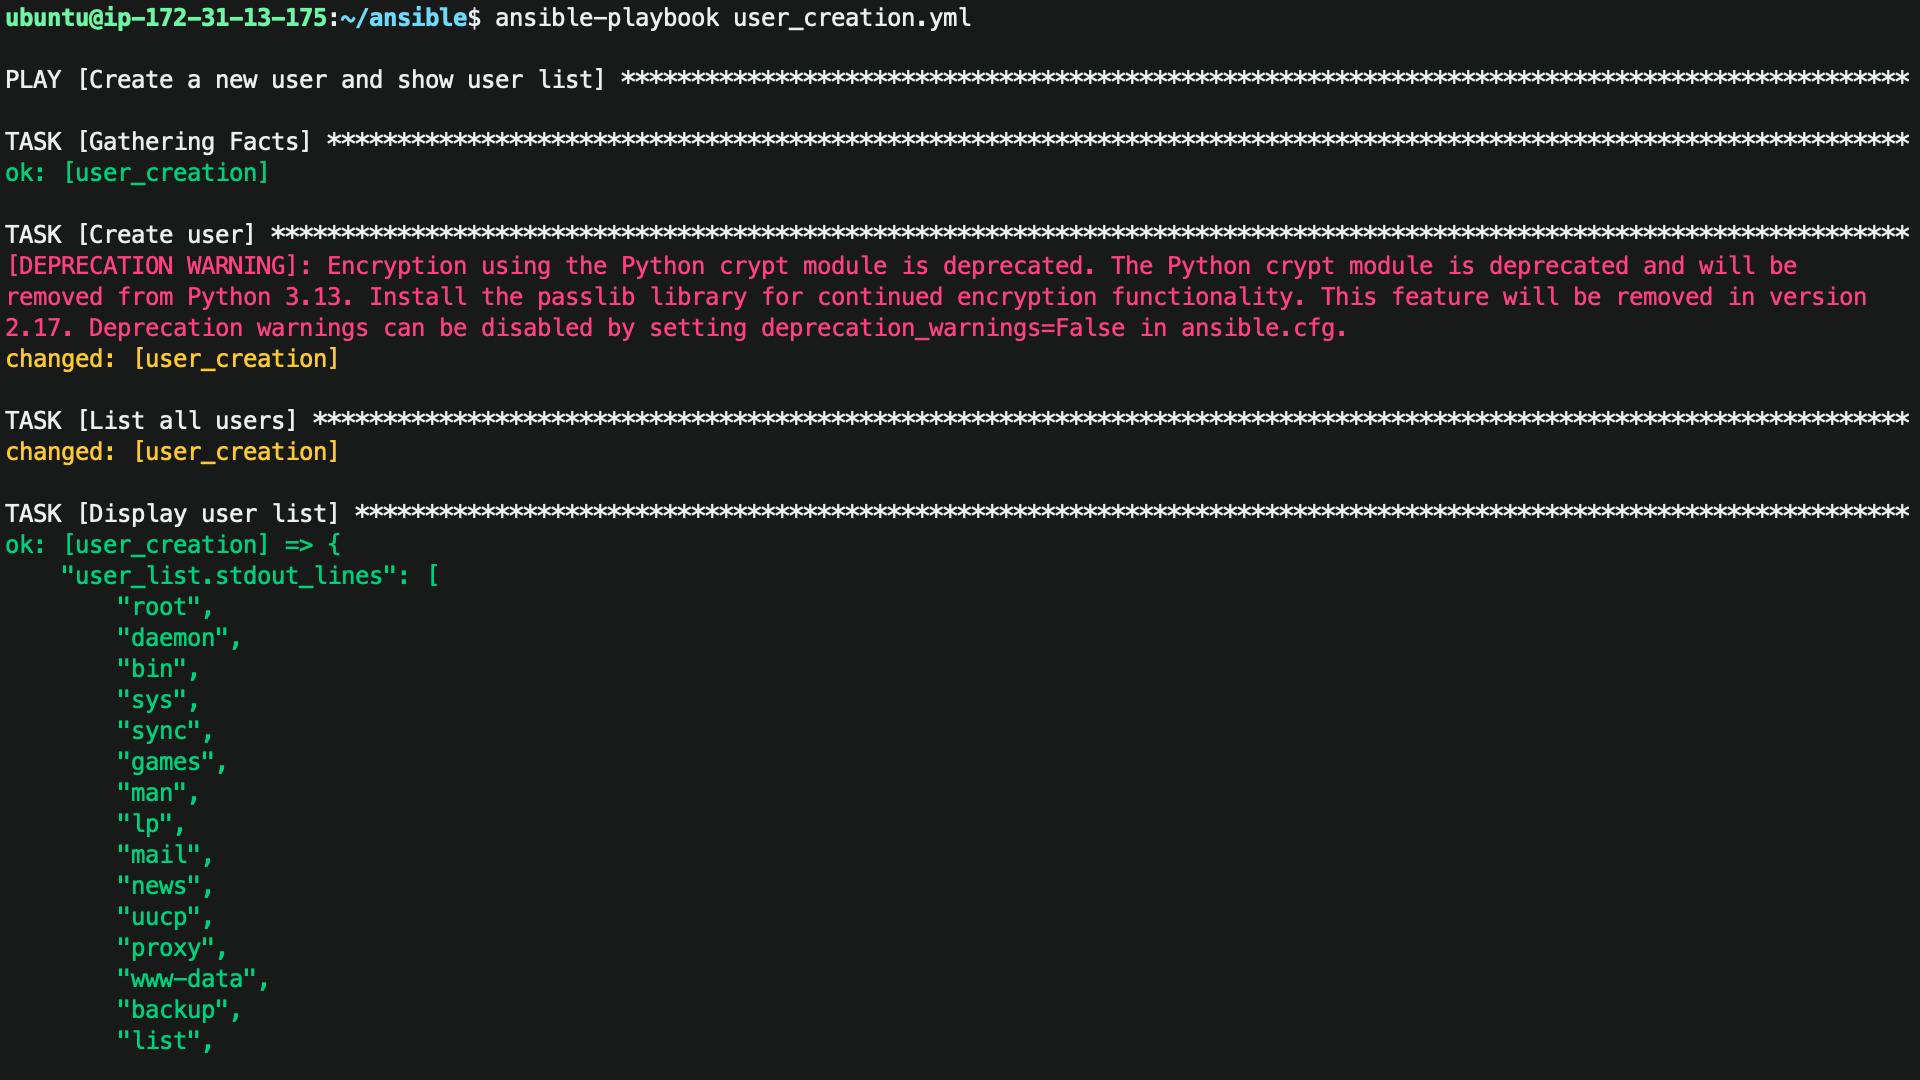
ansible-playbook user_creation.yml


The User Successfully Created.
---
- name: Install Docker on a group of servers
  hosts: servers
  become: true

  tasks:
    - name: Install dependencies
      apt:
        name: "{{ item }}"
        state: present
      with_items:
        - apt-transport-https
        - ca-certificates
        - curl
        - gnupg
        - lsb-release

    - name: Add Docker GPG key
      apt_key:
        url: https://download.docker.com/linux/ubuntu/gpg
        state: present

    - name: Add Docker repository
      apt_repository:
        repo: "deb [arch=amd64] https://download.docker.com/linux/ubuntu {{ ansible_lsb.codename }} stable"
        state: present

    - name: Install Docker
      apt:
        name: docker-ce
        state: present
This is an Ansible playbook that installs Docker on a group of Ubuntu servers. Here is a brief explanation of the different sections:
The
namekeyword specifies a name for the playbook.The
hostskeyword specifies the target hosts to execute the playbook. In this case, it is a group of hosts defined in the Ansible inventory file under the[servers]group.The
becomekeyword indicates that the playbook should execute with elevated privileges (i.e., become root).The
taskssection contains a list of tasks to execute in sequence.The first task uses the
aptmodule to install the necessary dependencies for Docker using thewith_itemsloop to install multiple packages.The second task uses the
apt_keymodule to add the Docker GPG key to the system keyring.The third task uses the
apt_repositorymodule to add the Docker repository to the system's list of repositories using the value of theansible_lsb.codenamevariable, which is the code name of the Ubuntu release version.The fourth task uses the
aptmodule to install the Docker Community Edition (CE) package.
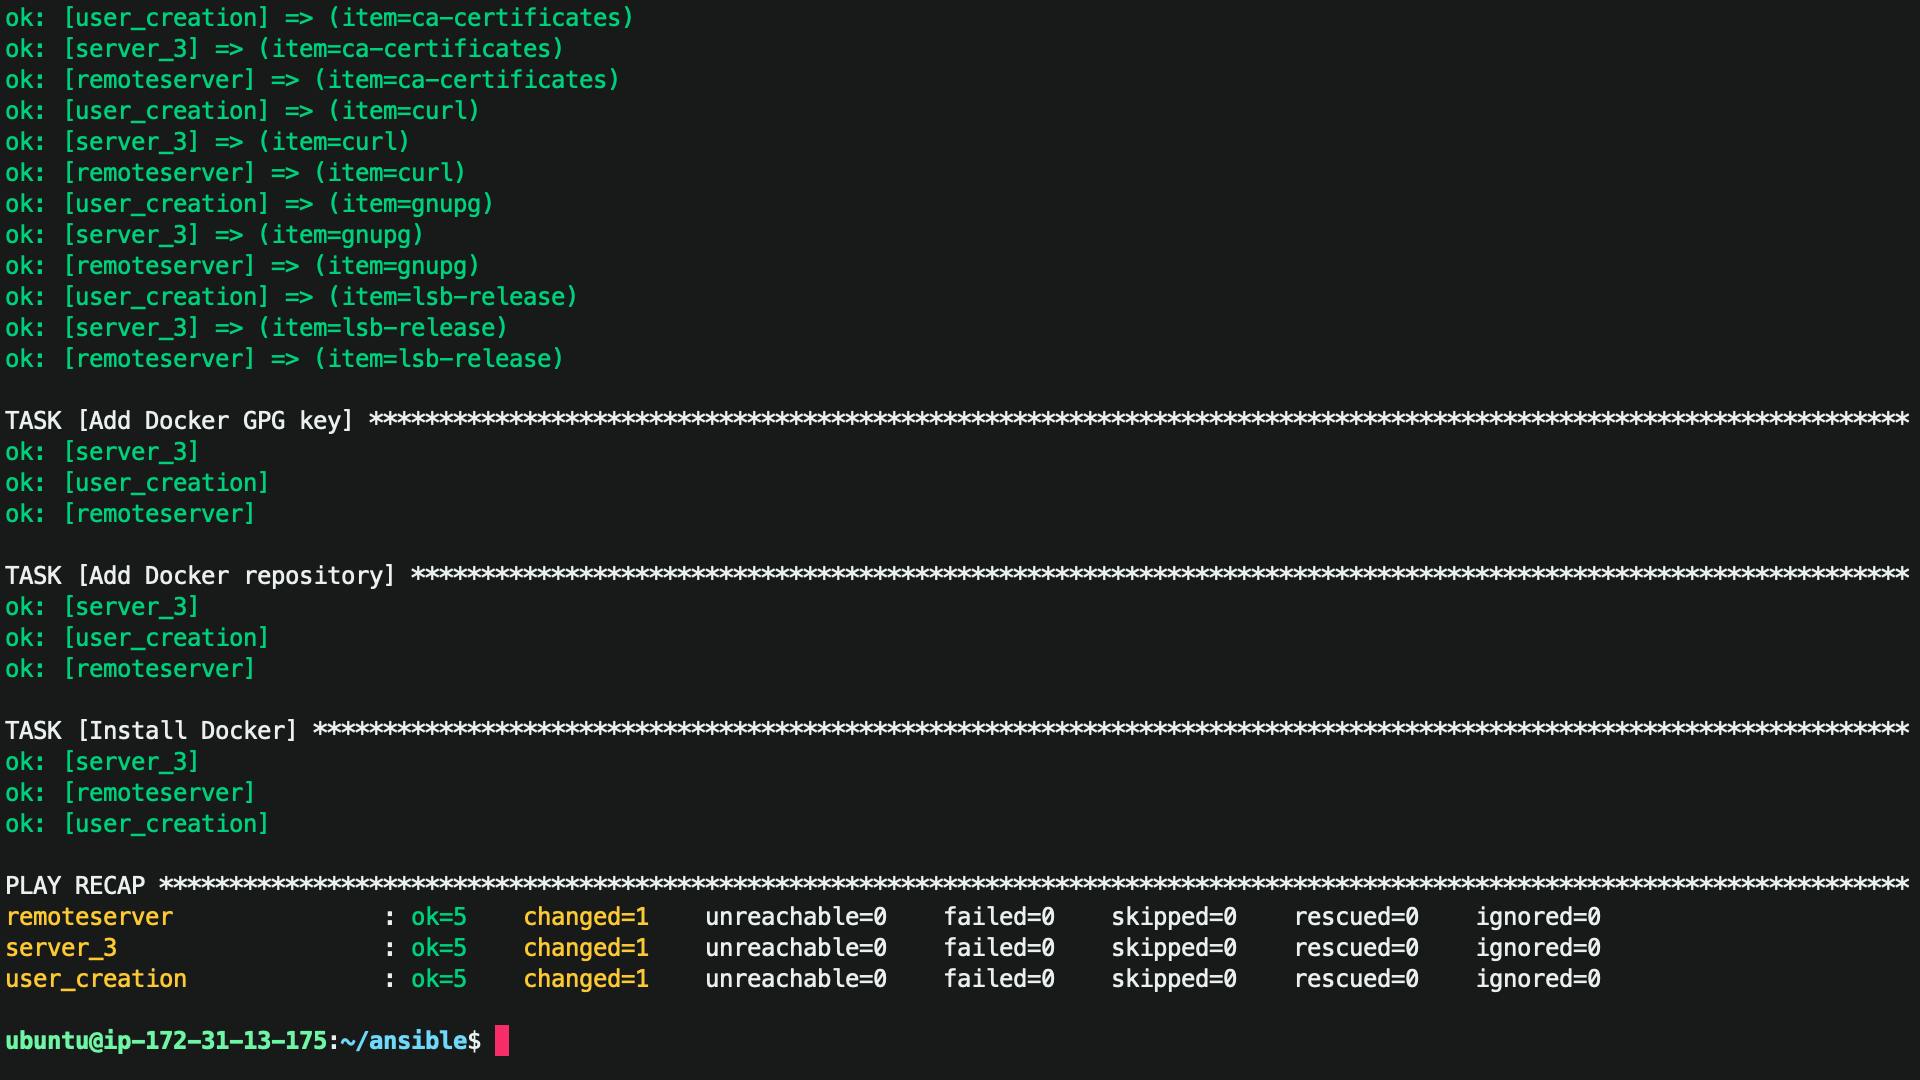
ansible-playbook docker_installation.yml


Successfully installed Docker on all servers.


